How to Record Screen on Windows 10: Effective Ways to Capture Your Screen Easily in 2025
Recording your screen can be essential for a variety of purposes, whether you need to create instructional videos, capture gameplay, or share presentations. In this guide, we will explore how to record screen on Windows 10, focusing on various methods, applications, and settings to enhance your screen recording experience. Let’s delve into the different options available and find the best ones suited for your needs.
Understanding Windows 10 Screen Capture Tools
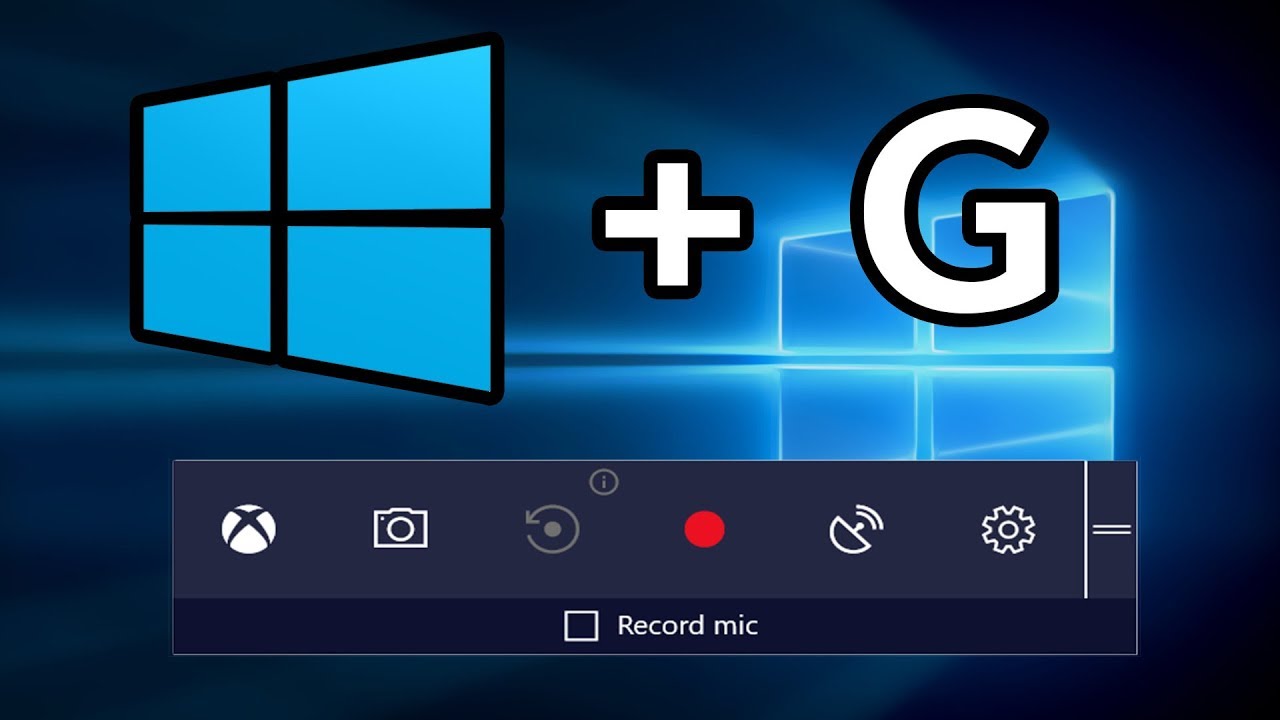
Windows 10 offers several built-in tools and features for capturing screen content. Among these, **Windows Game Bar** stands out as a popular option for gamers and content creators alike. This allows users to perform **screen recording** without needing external software. To access Game Bar, simply press Windows + G while in a compatible application, and you can record your screen with ease. The current features also allow you to **record screen with audio**, giving you the capability to include commentary in your videos.
Accessing the Windows Game Bar
To utilize the Game Bar on Windows 10, ensure that it is enabled. Navigate to Settings > Gaming > Xbox Game Bar and toggle it on. This allows you to start the Game Bar with the designated keyboard shortcut. Once activated, the overlay provides intuitive controls for **screen recording settings**. You can customize settings such as audio sources and performance options to enhance the quality of your recordings.
Exploring Screen Recording Software
While the built-in features are fantastic, the world of **screen recording software** offers numerous programs that can enhance your **screen recording tutorial** experience even further. Tools like OBS Studio or ShareX are excellent for users looking for more advanced features, such as scene customization, support for multiple displays, and direct streaming options. These programs allow for **high-quality screen capture**, accommodating a variety of personal or professional needs.
Best Screen Recorder for Windows 10
When searching for the **best screen recorder Windows 10**, consider functionality alongside ease-of-use. Free screen recording applications like OBS Studio are great for beginners and seasoned users alike, providing an excellent range of features at no cost. Alternatively, paid applications may offer additional support and functionalities, which can enhance your overall recording experience. When choosing, think about your specific needs, such as whether you’re capturing high-fidelity gameplay or developing instructional materials.
Simple Steps for Capturing Video on Windows 10
To **record screen on Windows 10** effectively, you can achieve superior results by following a systematic approach. Each piece of software might differ slightly, but key steps usually remain consistent across various applications. A well-defined plan will improve your recording consistency and quality.
Step-by-Step Screen Recording Process
Here’s a simple step-by-step guide on **how to take screen recording**:
1. Select a screen recording tool – Choose between Game Bar for a quick capture or a dedicated program for more advanced features.
2. Open the application or window you want to record – Make sure all necessary elements are in view.
3. Set up your audio options – If you wish to include commentary, escape and set your microphone settings.
4. Start recording – Use the appropriate shortcut (for Game Bar, press Windows + Alt + R) and commence your recording.
5. Stop the recording and save your footage – Ensure you manage the destination folder properly for easy access later.
Following these steps will help you maximize your efficiency when **capturing video on Windows 10** for any project.
Editing Screen Recordings
Once your recording process is complete, you might need to refine the footage through editing. Many video capture software solutions come equipped with basic editing features, allowing for trims, annotations, or overlays directly within the program. If not, consider using external software such as HitFilm or DaVinci Resolve, which provide advanced options to enhance your recorded content. Being able to edit your recordings gives you the power to create polished, professional-looking tutorials.
Useful Tips for Effective Screen Recording
To improve the quality of your recordings, consider these useful tips:
– **Record in a quiet environment** to minimize background noise.
– **Choose the right resolution and frame rate** based on your recording purpose.
– **Experiment with settings**, like video quality, to discover what suits your needs best.
– **Practice your narration** if you’re including voice comments to improve delivery.
Implementing these strategies will help ensure that you produce high-quality screen recordings, making the content you share more engaging and effective.
Recording Screen for Various Purposes
The versatility of screen recordings allows for a vast array of applications, from **recording video playbacks** to creating tutorials or business presentations. Understanding how to tailor recordings for specific tasks makes your workflow more efficient.
Making Instructional Videos
Recording tutorial videos has become increasingly popular alongside online learning. To create impactful instructional videos, focus on clarity. Screenshots, split-screen effects, or **overlay features** combined with your voice or webcam display can make instructions easier to follow. Ensure your video remains engaging, leading viewers step-by-step through the process, and don’t forget to **share your recordings online** with appropriate platforms to reach your intended audience.
Recording Webinars and Presentations
If you’re creating professional content for webinars or presentations, make use of tools equipped for **screen recording for presentations**. Ensure comprehensiveness by preparing your materials in advance, keeping auxiliary visuals at hand, and testing your recording setups prior to the actual recording to avoid any technical issues. Recording your content gives you the option to revisit and re-share, enhancing its reach and effectiveness.
Screen Recording with Webcam Integration
Sometimes, adding a personal touch to your recordings can significantly enhance viewer engagement. By integrating your webcam into your screen recordings, you can connect with your audience on a more personal level. Most screen recording tools allow you to add your webcam feed, create picture-in-picture (PiP) layouts, or capture both simultaneously. This ultramodern approach can serve as an effective component for instructional videos or live streaming content.
Key Takeaways
- Utilizing Windows built-in tools like Game Bar can simplify the recording process.
- Exploring various screen recording software can enhance your functionality and quality.
- Applying best practices and editing post-recording can dramatically improve viewer experience.
- Customizing screen recording based on your content needs is crucial for effective output.
FAQ
1. How do I save my screen recordings?
After recording your screen, the Game Bar automatically saves the file within your Videos > Captures folder. For other software, ensure you select a preferred save location in the application settings before recording begins.
2. Can I record my screen without software?
Yes, using the built-in **Windows Game Bar** is a way to record without additional software. It allows basic recording functions such as **recording gameplay on PC** easily. Adjust the settings to optimize your capture quality.
3. Are there free screen recording options available? What are they?
There are numerous excellent free screen capture tools, with **OBS Studio**, **ShareX**, and **Screencast-O-Matic** being some popular options. Each provides unique functionalities that cater to various recording needs.
4. Can I annotate my screen recordings?
Many advanced facers in screen recording applications allow you to annotate recordings in real-time during the capture or add annotations when editing. This feature can enhance instructional clarity.
5. How do I fix audio syncing issues during recordings?
If you regret experiencing audio syncing problems, ensure that your system’s audio settings are correct before recording. Integrated software comes with audio options that may need adjustment to align audio timing as well.
6. What tech specifications should I consider for effective screen recording?
For optimal recording performance, consider hardware specifications such as sufficient RAM, a modern graphics card, and a good CPU. These components will enhance both the quality and smoothness of your captures.
7. How do I share my recordings effectively?
Screen recordings can be shared through platforms like YouTube, Vimeo, or cloud services such as Google Drive and Dropbox. Be sure to compress the file if it’s hefty for easier sharing without compromising its quality.