How to Effectively Use Snipping Tool in 2025 for Quick Screenshots
In the digital age, the ability to quickly capture and share visual information has become essential, making tools like the **snipping tool** indispensable. Whether you are a student, a professional, or someone who frequently needs screenshots, knowing **how to use the snipping tool** effectively can enhance communication and streamline workflows. In this article, we’ll cover everything you need to know about the snipping tool, including its features, shortcuts, and practical applications.
Understanding Snipping Tool Features
The **snipping tool** provides several features that make it versatile for various use cases. It allows users to capture anything from a small portion of the screen to an entire window. With different capture modes—free-form, rectangular, window, and full-screen—you have the flexibility to capture exactly what you need. Additionally, the **snipping tool** includes basic editing options, enabling you to annotate, highlight, or crop your screenshots before saving them.
Snipping Tool Capture Modes
There are four primary capture modes in the **snipping tool**:
- Free-Form Snip: Draw a shape around the area you want to capture.
- Rectangular Snip: Click and drag to create a rectangular selection.
- Window Snip: Select a specific window to capture.
- Full-Screen Snip: Capture the entire screen at once.
Each mode is useful depending on the type of content you want to capture; for example, **using the snipping tool for work** often requires specific rectangular or window captures for clarity in documentation.
Editing and Annotation Features
Once a screenshot is captured, the **snipping tool’s editing** interfaces allow users to enhance their snips without relying on additional software. You can use a highlighter to emphasize key areas or crop out unnecessary parts to focus on essential details. This feature simplifies documentation processes, making it easier to share relevant information.
Snipping Tool Shortcuts for Enhanced Productivity
Utilizing **snipping tool shortcuts** can significantly speed up your workflow. Users can quickly access snipping tool functions at their fingertips. For windows, pressing **Windows + Shift + S** launches a snip with options to choose your preferred mode. Incorporating keyboard commands improves efficiency when capturing frequent images.
Essential Keyboard Shortcuts
Here are some critical keyboard shortcuts to remember:
- Windows + Shift + S: Quickly open the snipping tool interface.
- Ctrl + N: Create a new snip from within the application.
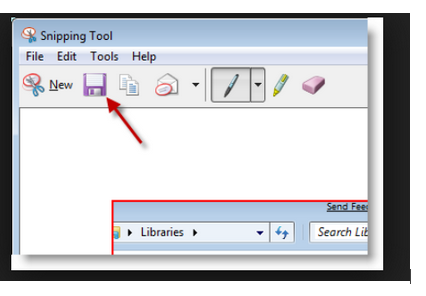
- Ctrl + S: Save your snip.
- Ctrl + C: Copy the snip to the clipboard.
Embracing these shortcuts can yield significant time savings and improve your overall experience while **using the snipping tool**.
Optimizing Snipping Tool Use
To enhance your experience with the **snipping tool**, you might consider customizing settings according to your preferences. For instance, adjusting the default file formats for saved images or optimizing the interface settings can streamline your use. Make sure to explore **snipping tool settings** to tailor options that best fit your workflow and enhance productivity effectively.
Practical Applications of the Snipping Tool
Apart from the basic use of capturing screenshots, the **snipping tool** is applicable in various contexts including educational environments, business communications, and personal projects. Its role in productivity, and sharing ideas becomes evident when integrated into daily tasks.
Using Snipping Tool for Educational Purposes
For teachers and students alike, the **snipping tool** serves as an effective educational tool. Instructors can create visual aids for lessons while students can capture essential notes or create study resources. For example, a student might take a screenshot of an important research finding from a web page for later study and annotation, significantly enhancing their learning experience.
Snipping Tool in Business Communication
Within the corporate world, the **snipping tool** reduces miscommunication. Employees can create visual documentation for processes, share feedback with annotated screenshots, or highlight critical elements in reports. This shared visual context leads to clearer and more efficient communication during collaborations.
Common Challenges and Troubleshooting Tips
<pDespite the benefits, users occasionally face issues with the **snipping tool not working** as expected. Being aware of potential problems and knowing how to address them can save time and frustration.
Resolving Snipping Tool Issues
If you find that the snipping tool does not open or crashes unexpectedly, here are some steps you can follow to troubleshoot:
- Check for Updates: Ensure that your OS and the snipping tool application are updated, correcting any compatibility issues.
- Restart the Application: Sometimes simple restarting can resolve glitches.
- Re-enable Snipping Tool: If snipping tool is disabled, enabling it through system settings can solve access issues.
Understanding how to troubleshoot common snipping tool problems ensures seamless use and productivity in your tasks.
Key Takeaways
- The **snipping tool** offers various features including multiple capture modes and editing options for enhanced effectiveness.
- Mastering **snipping tool shortcuts** can speed up the process of taking and sharing screenshots.
- Utilize the snipping tool for educational and business applications to improve clarity in communication.
- Be proactive in troubleshooting common issues to maintain smooth usage.
FAQ
1. What are the best alternatives to Snipping Tool?
There are several alternatives to the **snipping tool**, including third-party applications such as Greenshot and Lightshot. These options often offer additional functionalities, such as more robust editing tools, cloud storage options, and advanced sharing capabilities.
2. How do I share my screenshots from the Snipping Tool?
After capturing your screenshot, you can either directly copy the image to your clipboard and paste it wherever you need (using Ctrl + C) or save it as a file by clicking on **File** > **Save As**. Then, you can share the saved file via email or other communication platforms.
3. What file formats can the Snipping Tool save images in?
The **snipping tool** typically allows saving screenshots in several file formats, most commonly PNG and JPEG. PNG format is preferable for maintaining the quality of text and images, while JPEG is more suitable for photos.
4. How can I customize the Snipping Tool interface?
You can customize the **snipping tool’s** interface via the settings menu. This allows you to change default options such as image quality, file formats, and keyboard shortcuts based on your preferences, enhancing your workflow.
5. What steps can I take if the Snipping Tool won’t open?
If the **snipping tool** does not open, try restarting your computer. If the issue persists, check your system settings to ensure it’s not disabled, or run a troubleshooter for software compatibility issues within the control panel settings.